

Your Cannabis Cultivation Guide
This guide provides detailed information and proven strategies to help you achieve optimal cannabis growth. From seed to harvest, we cover essential topics to ensure successful and bountiful results. Explore our resources and cultivate your cannabis with confidence.
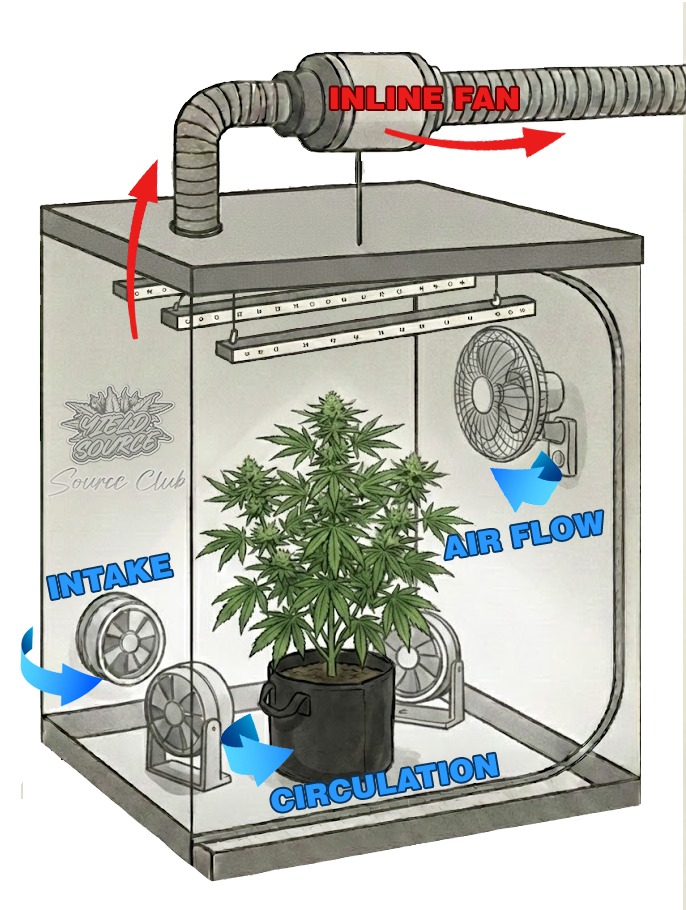
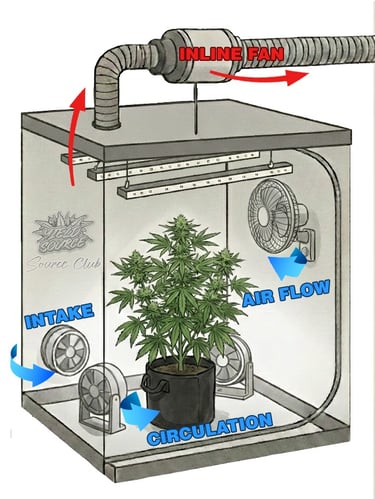
SET UP YOUR GROW AREA
Setting up an efficient environment is the most important step in a successful harvest. This layout focuses on optimal airflow and space management.
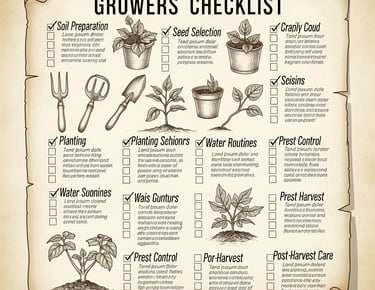
Checklist
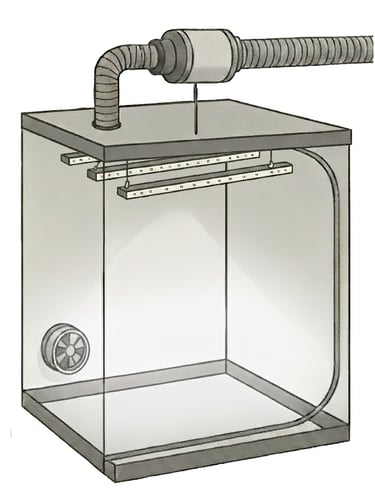
1. Assemble the Frame and Shell
Build the metal pole frame first, then pull the fabric shell over the top. Make sure all zippers work and that the floor tray is inserted to catch any runoff water.
2. Hang the LED Bar Light
Using adjustable rope ratchets, hang your light from the ceiling crossbars. Position the light at the very top of the tent initially. This provides maximum space for your plant to grow. This is a pro tip to get massive plants. Never move the light up and down to increase the intensity. Always buy a light that is stronger than your recommended space and use the dimmer. Save and use this calculation as a guide:
Square Area x 35 = Lights Wattage
Example: A 4ft x 4ft Tent
Step 1: 4 X 4 = 16 square feet
Step 2: 16 x 35 560 Watt light, round up to a 600w more is better.
3. Install the Exhaust System
The exhaust outlet lines should be at the top of the tent because hot air rises and C02 is heavier than air and you don't want to remove what's needed.
Place your inline fan and carbon filter (if using one) any where it will fit. The inline fan does not have to be inside or on top of the tent. You can attach it to a wall in another room as long as you have an exhaust duct pulling used air out of the tent.
The exhaust ducting: Attach the flexible ducting to the fan. Lead it away from the tent, out a window, or into another room, to ensure you aren't just recycling hot or humid air back into the grow area.
4. Set Up the Airflow (The "Triangle" Method)
Proper circulation prevents mold and strengthens stems. Your plants should always be in motion.
Floor Fans: Place two small fans on opposite sides of the floor. This keeps air moving under the foliage and promotes air pruning.
The canopy Fan: Mount an oscillating fan to a vertical pole. This breaks up "hot spots" near the light and ensures the top of the plant stays cool. If you have a grow tent larger than a 3x3 you will need additional pole fans.
5. Position the Intake
Ensure the bottom mesh vents or "passive intake" ports are open (as seen on the bottom left of the diagram). This allows fresh, cool air to be sucked in as the top fan pulls old air out. It is recommended to designate a lung room or a inlet for fresh air. Attach ducting to your intake port and run it to this area. it can be as simple as a hallway or den where people sit and talk. If using a wind be sure to filter the air at both ends of you ducting to avoid pests and pathogens.

WHAT TO FEED
This feed chart provides a precise nutrient schedule optimized for hydroponic and coco coir growing. If you're using soil as your medium, you can still benefit from this chart with a simple adjustment.
Adapting for Soil Grows:
Use the Same Nutrient Line: Refer to the Advanced Nutrients products listed in the chart.
Choose Soil-Specific Formulas: When purchasing, select the Advanced Nutrients products formulated for soil. These soil-specific versions are designed to work optimally with soil's unique properties.
Organic Option Available: Advanced Nutrients also offers organic nutrient lines (O.G.) compatible with soil, if you prefer an organic approach.


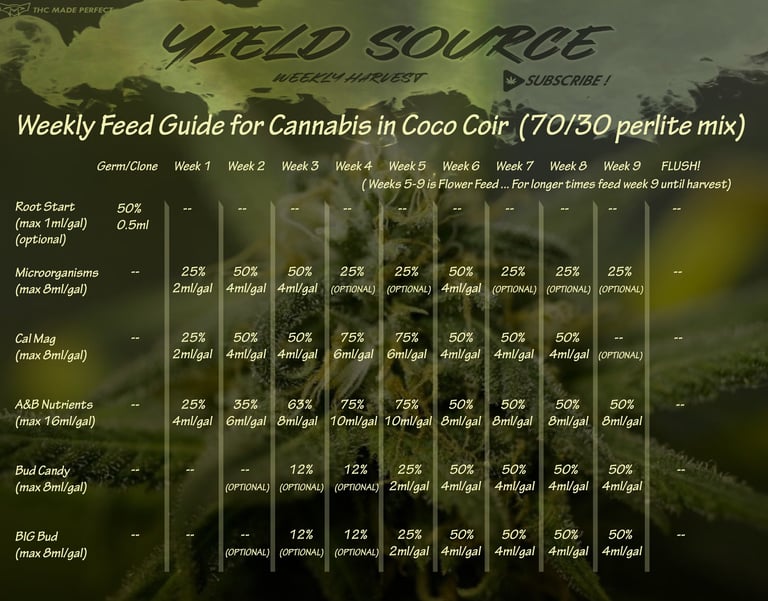


This chart outlines feeding schedules from germination to flowering. Remember, it's a guide; strain differences and environmental factors impact growth. While following it precisely is possible, healthy plants require more than just nutrients. This chart can provide a solid foundation for your feeding regime. The percentages shown represent a portion of the manufacturer's maximum recommended dose. This chart adjusts those percentages for optimal consistency. All measurements are per gallon of water, not per pot size.
Hydroponics: Change your reservoir every 2-3 days.
Coco Coir: Mix and feed nutrients daily.
Soil: Water only when needed, and include the listed nutrients in each watering.
For accurate nutrient delivery, use a pH meter to maintain optimal pH @ 6.0 for nutrient uptake and microbe health in coco. For soil it should be buffered to 6.3. Growers need to use a PPM meter to measure nutrient solution strength. This section provides reference PPM values; it's already calibrated for each growth week.
THIS FEED CHART IS EXPLAINED IN THIS VIDEO

THE DIFFERENT WAYS TO FEED
1. Hand Watering
The universal starting point. The grower is in total control of when and how much the plant eats. Depending on your medium the actual food is applied either through the water or directly to the medium. To skip to how you are growing select your medium.
SOIL - SOILLESS - HYDRO
-Bottom Feeding: Placing the pot in a shallow tray of water and letting the medium soak it up from the base.
2. Wicking Systems
The simplest "automated" method. Very similar to bottom feeding, It uses a physical wick (like cotton or nylon rope) to pull water from a reservoir, or tray up into the root zone via capillary action. No pumps, no noise.
3. Drip Irrigation
A step up in automation. Small emitters deliver water directly to the base of each plant from a reservoir. This is the most efficient way to manage large numbers of plants without breaking your back.
4. Gravity Systems
Similar to Drip, but powered by height rather than electricity. By placing the reservoir higher than the plants, gravity pulls the water through the lines.
5. Ebb and Flow (Flood and Drain)
A transition into more active systems. A pump periodically floods a grow tray with nutrients, then lets it drain back into a reservoir, pulling fresh oxygen into the root zone as the water recedes.
6. Drain to Waste
Similar to bottom feeding, but specific in its goal: plants are fed fresh nutrient solution every time, and the "runoff" is never reused. This ensures the plants always get a perfectly balanced meal without pH swings.
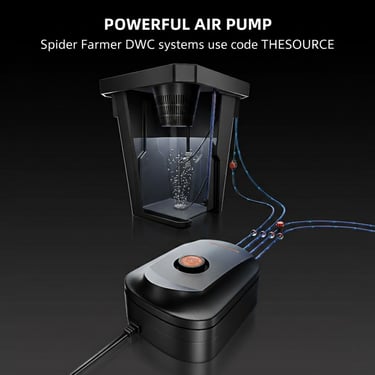
7. DWC (Deep Water Culture)
Plants are suspended over a reservoir or bucket with their roots submerged 24/7 in highly oxygenated nutrient rich water. Simple, fast, and effective.
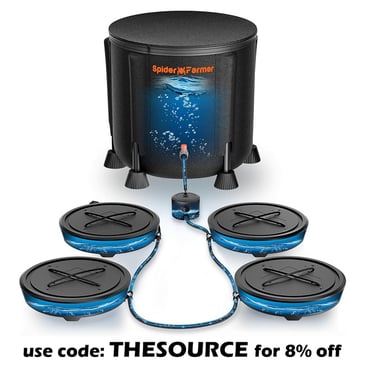
8. RDWC (Recirculating Deep Water Culture)
The "Pro" version of DWC. Multiple buckets are connected to a central reservoir. A pump keeps the water moving through all the buckets constantly, ensuring every plant gets the exact same nutrient concentration.
9. NFT (Nutrient Film Technique)
A specialized recirculating system where a constant, very thin "film" of nutrient solution flows over the roots inside a tilted channel. It’s the ultimate way to balance maximum water access with maximum air access. Similar to RDWC but with much more room for air and oxygen.


CHECKLIST
EC/PH meter
PH up and down solution
Pots (fabric or plastic) 3 gallon and 1 gallon with saucers
Grow light of your choice
Tent or Grow space
Fans Oscillating (preferred) but you can use box fans, floor fan, clip-on, or tower fan.
Something to use as plant labels (clothes pins, tongue blades, plant tags, popsicle sticks)
Measuring devices (1 cup set), 5ml syringe, 20ml syringe, shot glass.
Nutrients (dry or liquid nutrients)
5-gallon buckets to hold water for your plants (as you make bigger grows you may need 2 buckets)
Optional
Hydrogen Peroxide
Reverse Osmosis Filter (one that attaches to your basement sink is under $50)
Mycorrhiza
Q. Do I need to add nutrients to Happy Frog, Ocean Forest, or any pre-amended soils?
Only when the initial nutrients are exhausted which is about 3 weeks on average. If you add nutrients you may burn your plants.
Q. What does NPK stand for?
Nitrogen, Phosphorus, Potassium. These are the core macro nutrients that plants need.
Q. What’s the difference between an Auto and a Photo?
“Auto (Autoflowering): These plants are genetically programmed to flower automatically based on their age, usually around 2-4 weeks after germination, regardless of the light cycle they receive.” “Photo (Photoperiod): These plants rely on changes in the light cycle to trigger flowering, usually requiring a reduction in light hours to initiate this process.”
Q. Why can’t I water my plants with the water straight from my tap?
“Tap water can be detrimental to some plants due to various chemicals and minerals it contains, which can accumulate in the soil and negatively impact plant health. Specifically, chlorine, fluoride, and salts from water softeners can be harmful.”
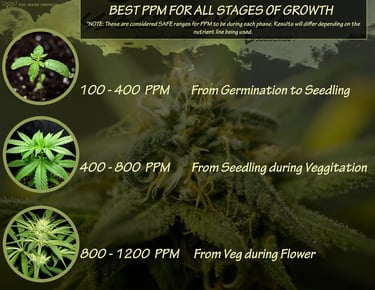
Q. What is PPM and why is it important?
A1. “PPM stands for parts per million. In the context of plant care, particularly in hydroponics and gardening, it refers to the concentration of dissolved minerals and nutrients in the water or nutrient solution used to feed your plants”
A2. “ Monitoring and adjusting PPM helps ensure your plants receive the optimal amount of nutrients. Too high a PPM can lead to nutrient toxicity or "burn," where plants absorb too many nutrients, causing yellowing or browning leaves and stunted growth. Conversely, a low PPM indicates nutrient deficiency, leading to stunted growth, yellowing leaves (particularly a sign of nitrogen deficiency), and poor flowering.”
Q. How do I tell how much longer my nutrients will or if my plants are hungry?
“Monitoring runoff PPM (parts per million) is crucial in plant cultivation, both for soil and hydroponic systems. It provides insight into how well your plants are absorbing nutrients and can help you avoid problems like nutrient burn or deficiency.
General Guideline: Ideal:
A runoff PPM that is slightly lower than the PPM of your nutrient solution indicates that your plants are effectively absorbing nutrients. Too Low: If the runoff PPM is significantly lower than your nutrient solution, it might mean your plants are not getting enough nutrients. This could be due to nutrient deficiency or problems with nutrient uptake. Too High: A higher runoff PPM suggests that there's an excess of nutrients in the root zone, which can lead to salt buildup and potential nutrient burn.”
Q. Is Organic superior to Synthetic?
“Neither organic nor synthetic plant nutrients are inherently "better" than the other; instead, they serve different purposes and have different pros and cons.” The plants cannot tell the difference.
Q. How long is my plant going to take from seed to harvest?
This is going to be dependent upon the strain, environment, nutrient requirements, and grow style. On average sativa plants from equatorial regions tend to take longer to flower. This will also be dependent on how you count your growth stages for example, 4 weeks of seedling, 4 week veg, 8 weeks flower. Some strains from Asia (Thai) can take up to 6 months from seed to harvest. An autoflower can be done as soon as 60 days total.
Q. What’s the difference between regular (regs) seeds vs feminized seeds?
Regs are a natural mixture of 50% male and 50% female. Feminized seeds are all female coming from a female plant that was chemically treated to produce pollen. Since the pollen comes from a female plant with no male chromones this makes all the seeds from the pollinated plant female.
Q.What are clones and how are they made?
Clones are cuttings from a male or female plant. The clones/ cuttings from the plant are cut and placed in a medium or hydroponic cloner to sprout roots and are replanted. They are identical replicas of the mother or donor plant.
FREQUENTLY ASKED QUESTIONS
MORE EXPLAINED IN THIS VIDEO


HOW WILL YOU GROW?
PICK ONE
Contact
THESOURCE@MAIL.COM